
Tuesday, July 12, 2011

Tutorial: How to can or preserve green beans

Canning is one of those things that seems daunting at first, but after a time or two, becomes very simple and easy! It is a lot of fun for me and soooooo very rewarding.

Today, I thought I'd go through a step by step tutorial of how I preserve my garden's green beans. So far this year, we have picked beans three times, and I have been able to can 16 1/2 quarts of beans!

Side note--There are two different canning methods: hot water (or boiling water) bath and pressure canning. For low acid foods, which is what green beans are, you must use a pressure canner. You can read about why that is here.

{Disclaimer: This is a rough outline of canning. If you are going to begin canning for yourself at home, please do not pull up this tutorial and use it as a guide--I'm giving general guidelines where, in some cases, there are more specific instructions--and following each step exactly is very important. The Ball Blue Book of Preserving is an excellent resource, and what I refer to each and every time I get out the canner!}

Here we go!
Get'cha a big ol' pile of beans.
Clean them well....

....snap the ends off....

...and then snap them in half. You want about two inch or less pieces.

I will be honest here.  Most of the work, I feel, of canning beans is in the above two pictures.
It takes a while (especially when you have a giant pile) to snap all of the beans.
Once you have this done, truly--the rest flies!
{General rule of thumb: a pound of beans (pre-snapping) makes about a quart.}

You'll need to start heating your jars at this point.
 I have very hot tap water, so I just fill up my sink and submerge my jars for several minutes.
You want them hot so that they don't break when they go into the hot canner.

Pull your hot jar out of the water to start filling.
A canning funnel is a very useful tool.
Take your hot jar, load your funnel up on top....
....add one teaspoon of salt for a quart jar....
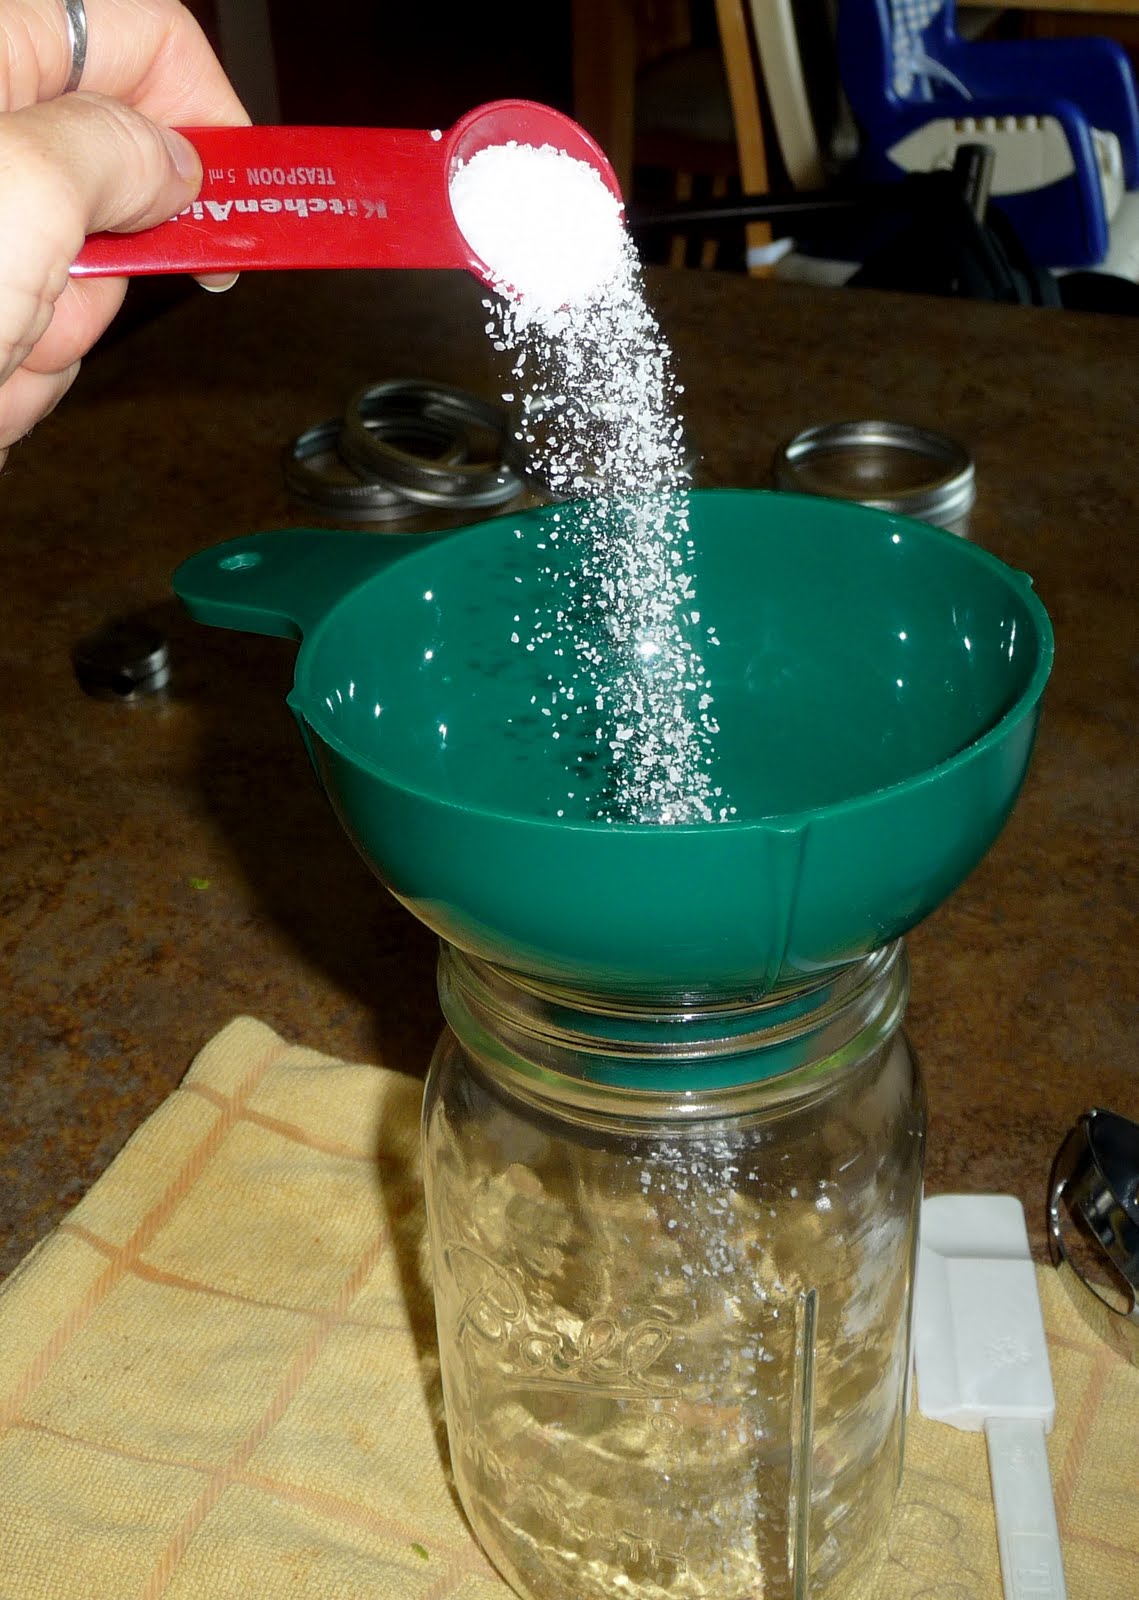
....then start dropping in your beans.

Fill your jar, leaving one inch headspace.

Pour boiling water over the beans (I am using a raw pack method here)....

...and then slide a non-metalic spatula down three or four sides of the jar.
Gently press to the middle to release any air bubbles that may have gotten trapped.
Next, take a clean cloth and wipe down the rims and threads of the jar, so than any bits
of food/gunk that may have gotten on the rim do not get in the way of the sealing compound
that is on the lid you are about to put on.

You'll want to have your lids in just-below-simmering water during this time.

When you are done filling your first jar, grab a lid
(this is a handy tool for that, but I don't have one, so I just use tongs)....

....and then place it on the top of the jar.

After putting the lid on the jar, secure a band until it is finger tip tight--not too tight.

Using a jar lifter, load your jars into your canner.....

....one....

...by one.

Your water should be just below a simmer the entire time you are loading your jars.

Put your lid on and secure it in place.
I have mine marked where it should line up, so that I always know it is secure.

Now, turn your burner up to high....

....and wait for the water to boil and steam to begin escaping out of the vent.

Let the steam escape for 10 minutes.
Yes, I have to set a timer for everything or else I would forget about it.

After 10 minutes, put your weight on your canner for....

....10 pounds of pressure.

{If you have a dial gauge canner, you would need to consult the
Ball book on getting your canner to the proper pressure.}

At this point, I turn my heat down to about a seven on a one-to-ten scale.
This is after some trial and error--but I know that for this burner, this is the level of heat it needs to be at to keep a boil the entire processing time and maintain 10 pounds of pressure inside the canner.

Process quart jars--that's code for walk away now-- for 25 minutes.
{Set that timer.}

At the end of the 25 minutes, turn off the heat.
After two minutes, remove the weight with a heat proof object.


After all of the steam has escaped and the pressure has returned to zero, you can remove your canner lid. You will know if there is still pressure if you try to turn the lid and it will not budge. When there is no pressure remaining, the lid will turn easily. Let the jars sit for about 10 minutes to adjust to the lower air temperature, and then remove with a jar lifter onto a heat proof surface.

Within a few minutes, you will hopefully start to hear one of the most glorious sounds a canner will ever hear--the PING! of the lids as they seal!

At this point, yell "Wooooot!" for everyone in the house to hear.

Ah. Success.

Let the jars rest and cool over night. The next day, you can remove the bands (you don't want to store them with the bands on). Double check your seal--don't rely on that PING! noise. It should be concave, and when you gently lift up on the edge, it should not budge.

At this point, you are DONE!

Label your jars with the contents and date you canned them, and store in a cool place until you are ready to eat them.

That's it!


It may seem like a lot of steps, but I can preserve a batch of beans like this--from cleaning to snapping to loading jars and processing--in about two hours. For me and my family, it is more than worth my time and effort.

I'm dying to hear your thoughts and questions....


Tuesday, July 5, 2011

25 years ago, a little girl was given a special sweat shirt.  She wore it with pride, and always thought of her Dad and stepmom (who bought it for her) when she put it on.

And, then, when that little girl grew out of it, she put it in a box, hoping someone might wear it and love it again someday, just as much as she used to.

It said,

"Somebody

in New Jersey

loves

ME."

Many years later, that little girl who had grown out of her special sweat shirt got her wish: 
four little young 'ens who also love that shirt--and some times, even fight over it.

And we love those folks in New Jersey just as much as ever.


I think that shirt means more to me now than it ever could have back then.


Sunday, July 3, 2011

Weekend happenings

Yesterday was a miserable day to be outside.

However, that is right where my entire family was all. day. long.  Yard work and garden duties don't stop because the heat index is 110, you know!

The kids cooled off in the pool quite a bit, but did take some time here and there to help us bring in our haul of the day. Have I mentioned what great helpers they are?

Colin mainly helps out with "Lola duty", meaning he keeps her occupied and safe while we work pulling weeds or harvesting.  Today, though, he got to bring in a basket full of basil!!

I use the basil to make and freeze pesto*.  We love pesto on chicken, pizza, and pasta.  When tomatoes are plentiful in the summer, you can not beat them sliced thickly and topped with pesto, then broiled for about 10 minutes in your oven (or on the grill, in foil packets). Oh my goodness--heaven!

*Note: I use grated Parmesan cheese in mine, not Pecorino/Romano. Either works.

We--well, I say 'we' loosely, because actually Shane did all the bean harvesting this time--picked our first batch of green beans. And we had a ton!  As you can see, that bowl is about as big as Ethan!

This will make at least seven quarts of canned beans, plus some extra for fresh eating.
We'll pick again in about three days, and have another yield about this size.

We also brought in three heads of broccoli,
a giant bunch of cilantro (center),
several onions (they are small yet, but still taste great!)
and some more garlic.

With all that basil, I needed some help--so we had a basil picking party. The question posed to the boys was, "Who can pick the most leaves off of the stems in 10 minutes?" Not sure exactly who won, but it certainly was a fun way to get the job done.


Then I washed all the leaves and laid them out to dry, overnight. That is one huge pile!

Speaking of huge piles....anyone wanna come over for fresh beans in the next day or so? Whew.

My favorite....cilantro.  I use it for everything. 
Last night, it was Lime Cilantro chicken and pico de gallo for supper.

The pico de gallo is one of our summer/garden staples. 
This bowl--larger than my head--was gone in about 20 minutes. No kidding. 
We all love it--kiddos too--and it's a great way to sneak in some veggies.

Many people have flowers on their counter...I have a basil bouquet! *grin* 

I put the basil in some water to keep it fresh for lunch today. We had some yummy grilled burgers, corn on the cob, the broccoli we got yesterday from the garden, and used that basil for caprese salad!
{Why yes, there is one missing from the bottom of the platter. I just couldn't wait until after the photo....}

Lola chowing on some broccoli and corn


And today, we're out swimming again, with dinner and fireworks with friends coming up tonight. I love holiday weekends--hope yours is as wonderful as ours has been so far!

Thursday, June 30, 2011

{Garden} Haul of the day

So much keeping me busy these days....between swimming, gardening, working inside and outside our home, baseball, and my four sweet but very active children, there is barely time to spare to blog!

I thought I'd share a bit of one thing I am passionate about today--FOOD!!

This is a sampling of what we hauled in from our garden today. Soon, I want to show some before (as in, newly planted) and after (as in, current) shots of our garden, but this will have to do for now!

We 'thinned' the carrots today...and had to pull {and discard} so many! 
I had to make a note to myself to thin the carrots earlier next year--being as big and as orange 
(and as yummy-looking) as they were, it was REALLY hard to pull and toss out these babies! *giggle*

Here is a shot of some herbs that are ready to be used. 
The tall plants at the top and right of the photo are basil plants, which I use to 
make/eat/freeze pesto, then clockwise you have cilantro (lots and LOTS of it, because
we love our pico de gallo and salsa!) and Italian parsley.

Broccoli! Almost ready.

This gives you an idea of how BIG a broccoli plant really is!

Cameron (who, by the way, is an amazing garden helper) standing literally in a 'field' of green beans. 
We planted four rows, and they are ready to start being harvested! 
Canning tutorial on beans is coming up soon!

Zucchini coming on! Bread making is right around the corner.

Ethan got to harvest our first garlic of the season! It's not quite as big as it could 
be....we'll let the other 50 or so heads stay in the ground a while longer!

Cameron and Ethan both helped me pick raspberries.
{Our deal is that for every one they pick and put in the 'keep' bowl, they get to eat one!}
We have a humongous patch of them (it gets larger each year) and we haul in a 
bowl like this about every three days from now until September or so. Incredible.

My little helpers

So thankful for the blessing of being able to grow our own wonderful food, and for my amazing little helpers who aid me in harvesting it!

Tuesday, June 28, 2011

My two favorite vacation pics


At least, I think these are my favorite (out of like, 600!)  Much more to come soon!

Wednesday, June 8, 2011

Story time--some listen better than others

After reading an "All about Trains" book before our rest time:

Me: "And which type of engine won the contest?"

Ethan: "The Rocket!"

Me: "Very good, Ethan!  And what did they used to have to use to heat up the engine of the trains?"

Colin: "Wood."

Me: "Yep.  Wood...and what was the problem they had using wood?"

Colin: "It made sparklers that caught the people on fire."

Me: "Sparks...make sparks that caught the people on fire, yes."

Colin: "So, they had to make long chimneys at the top so that wouldn't happen anymore."

Me: "Yes, that's right.  And, when the engine tracks, trains, and people came West, what people did they run off of the land?"

Cameron: "Navy* Americans."

*Also know as Native