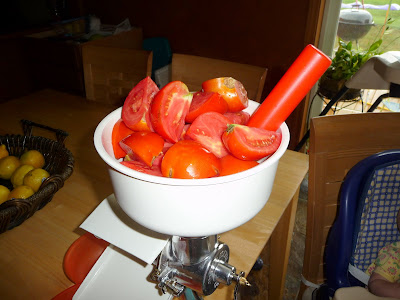
So, now that we have a big pot of tomato puree, let's fancy it up a bit!
Note to readers: From here on out, I will be giving all of my measurements in approximations. Unlike baking, which truly is more of a science or strict formula, cooking is a very to-your-own-preferences kind of thing. Frankly, I rarely measure anything when I cook. I just eyeball what I know to be tablespoons and teaspoons, etc.
I realize that, for the purpose of passing on recipes, this could be somewhat of a problem--and I will try my hardest to give an accurate 'best guess' of how much of things I am using. But just realize that, if you are going to do some sauce of your own, the best way to find your 'greatest recipe' is going to be by sticking your spoon in, grabbing a taste, and adjusting to what you and your family like!
Here we go:
You will need a large skillet, some good extra virgin olive oil....

....a few onions, and a couple of heads of garlic.
I have three medium organic white onions here, and I used all of them for this recipe.

Dice your onion. I won't need to dice finely here, because everything will soon be going into the food processor, which makes things even easier!
An easy way to dice the onion:
Cut off the top end and peel the outermost layer, but leave the root intact.
Make vertical slices in your onion, but stay about 1/2 inch back, away from the root.
The root will hold your onion together while you are dicing.

Now, slice back into the onion perpendicularly to what you just did.
{Per-pen-dic-u-lar-ly. Say that five times fast.}
Make two or three cuts....

....and now, take your knife and cut
parallel to the root.

Your onions will come off in a nice dice!
{Nice dice nice dice nice dice nice dice nice dice.}

It will be at this point when you can let your sweet second born child
know that you do not need his goggles to--and these are his words:
"Keep that onion stink out of your eyes so that they don't cry, Momma."

But you will thank him anyway, and get a few good laughs
as he protects his own peepers from 'the onion stink'.

Three onions gives me about 6 cups. Perfect!

Now the garlic.
Come to mama.

I'm no Emeril, but I do use a lot of cloves. I think it was about 15 or so in this recipe.
Again, your taste may vary. Add less--or more!
A tip from
Rachael: take your knife and lay it on top of your garlic clove,
blade side facing away from you, and give it a good solid whack with your hand.

Voila! Peeled garlic without the hassle.

Right after I am done removing all of the peels from the garlic, I throw my onions into my pan, which I have preheated over medium to medium high heat with about 1/2 cup of olive oil. I just do enough oil to thinly coat the entire bottom of my skillet. Give those babies a stir, and just let them cook till they soften up!

A garlic press. How I love this invention.

Did you know that the finer you chop garlic, the more potent it is in your finished dish? I mentioned already that we love garlic, so it is my aim to squeeze the heck out of every last clove to get every inch of flavor.

This is what 15 cloves of crushed garlic look like.

So, my onions are cooking down, my garlic is ready to go in....time for some herbs. Fresh ones.
My amazing, wonderfully talented husband (I seriously do not talk about Shane enough on this blog, but he is my hero is so many amazing ways!) built a set of planters this year for our deck--the planter closest to my sliding glass door houses my herb garden!
{L to R, front: Greek oregano, variegated thyme, chives; L to R, back: Italian flat leaf parsley, cilantro, and basil--both hard to see because they are younger plants and not that tall yet!}

Grab some basil leaves.....

....some thyme....

....and some oregano.
My quantity? A giant handful of each.

Now, I would normally add another giant handful of Italian flat leaf parsley here as well. However, I made the mistake of thinking that I had some 'cute little caterpillars' on my parsley....and thought, "Oh, I'll just let them be. They're not hurting anything!"
When in all actuality, those 'caterpillars' were some sort of parsley devouring worm. No joke--they ate my entire plant overnight. *sigh* Good thing that one is a vigorous re-grower.
Anyway--wash your herbs and dry them well.
By now, your onions have been cooking about 10-15 minutes and should be good and soft. Now, add your garlic, give it a stir, and cook for one or two minutes only--just until you start to really smell it.
Don't burn your garlic! Burnt garlic is NOT your friend. *shudder*

Turn off the heat on the pan, and let the onions sit while you remove the stems from your herbs. The stems are kind of woody, so you don't want those going in--just the flavorful leaves.
Put your slightly cooled onions, garlic, and oil into a food processor or blender....

....then add your herbs.

"Chomp it all up!" as my boys would say....

....until you have a nice puree of oniony-garlicy-herby-goodness.

Go ahead! Dump it all right on in there, into your tomato puree--which, remember, should be on a medium high heat and cooking down this entire time. You are going to reduce that pot of puree by half, to thicken the consistency from soup-ish to sauce-ish!

It is at this point when I add:
- Kosher salt and black pepper--freshly ground, please. At least a couple of teaspoons of each--you've got a big pot here--but keep testing. You don't want to over salt! You can always add more, but it's really difficult to take away. *grin*
- A couple of pinches of red pepper flakes. You want RED flakes--if they are brown in your jar, they are old and have lost their potency. Give 'em a squish with the end of your finger before you drop them in--it'll bring out their flavor.
- A pinch of sugar. Just a bit, to help cut the acidity.
The smell and color of your puree will deepen within moments.
We're talking all kinds of yummy here!

Stay tuned--next up, we're canning this goodness!


.png)


